
iOS Apple Pay Support
Lets get Apple Pay support setup for your iOS Lucra SDK integration
Enabling Apple Pay support through the iOS Lucra SDK requires additional setup through the Apple Developer portal
See more details
A. Register Merchant Identifier
Navigate to
developer.apple.com, clickIdentifiersand click the+button to register a new identifier.Select the
Merchant IDsradio button.
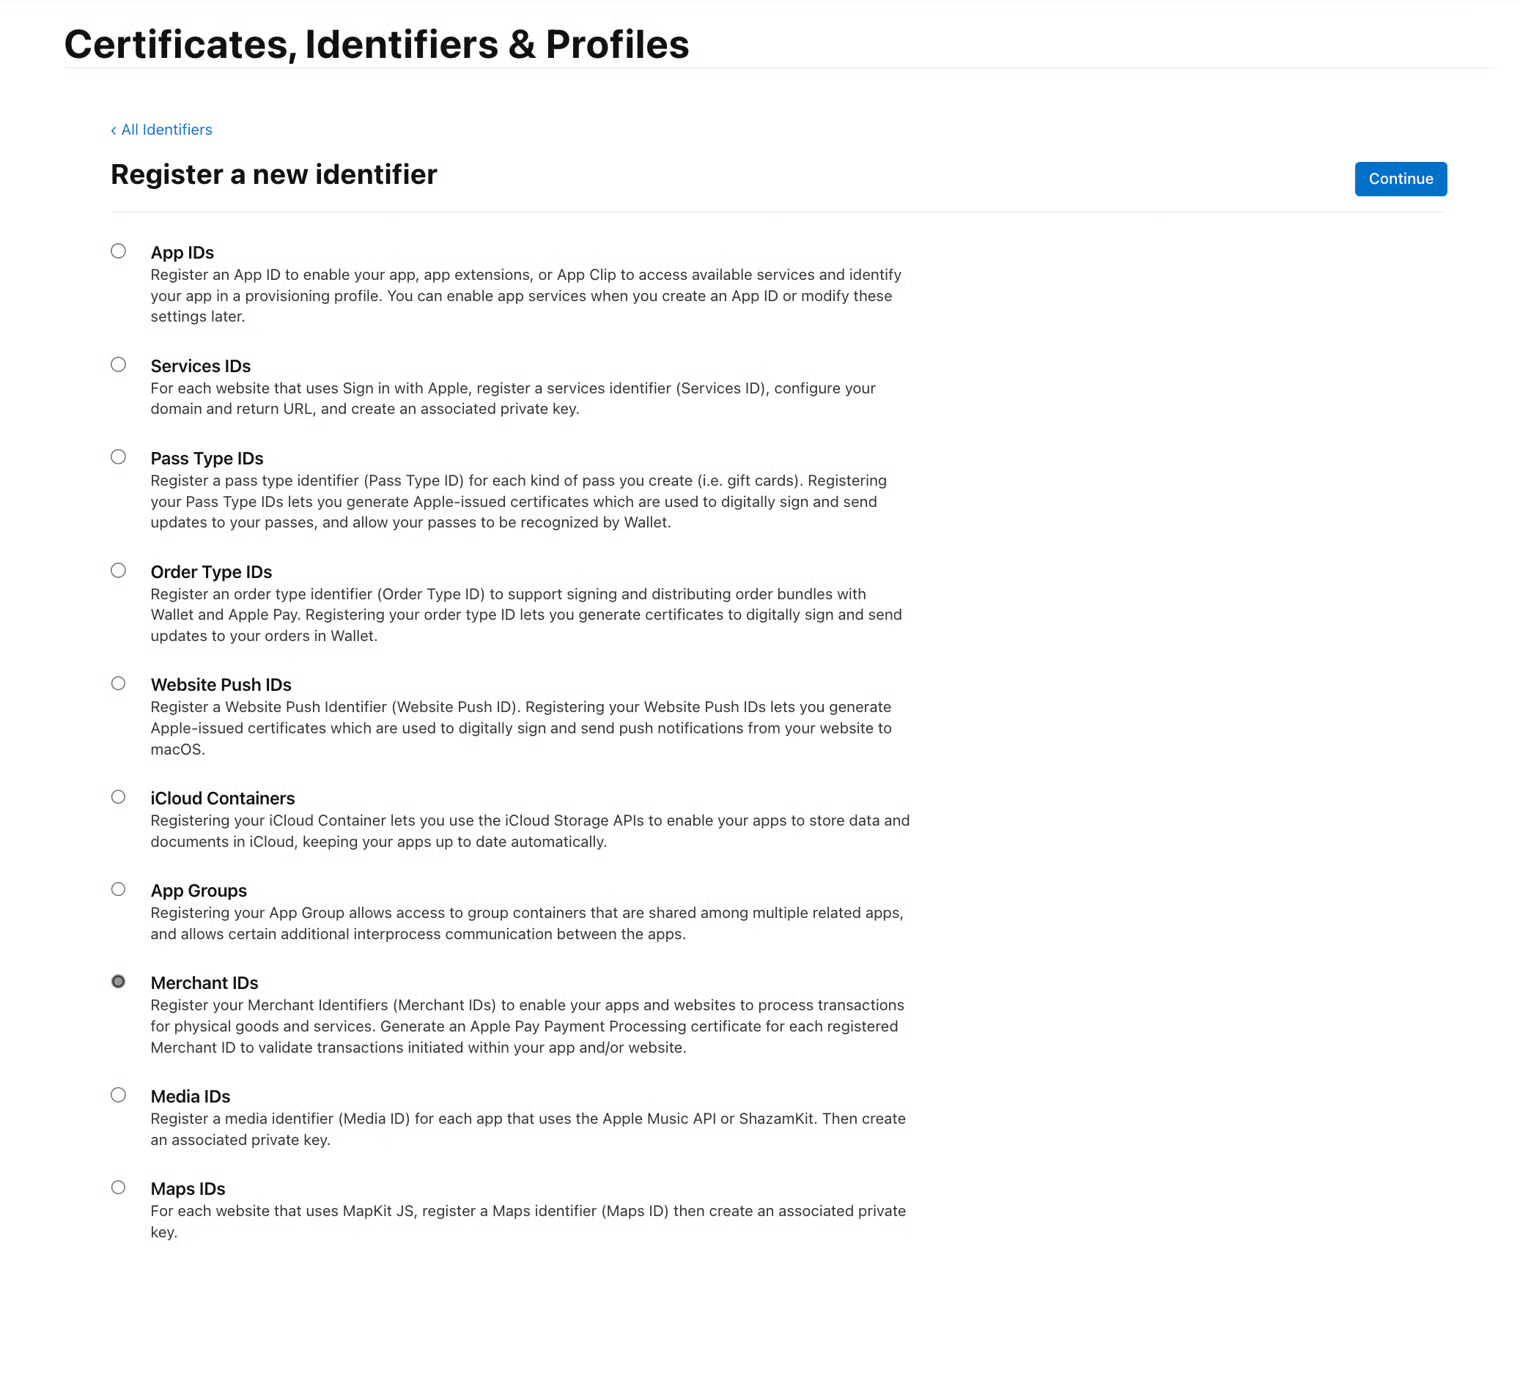
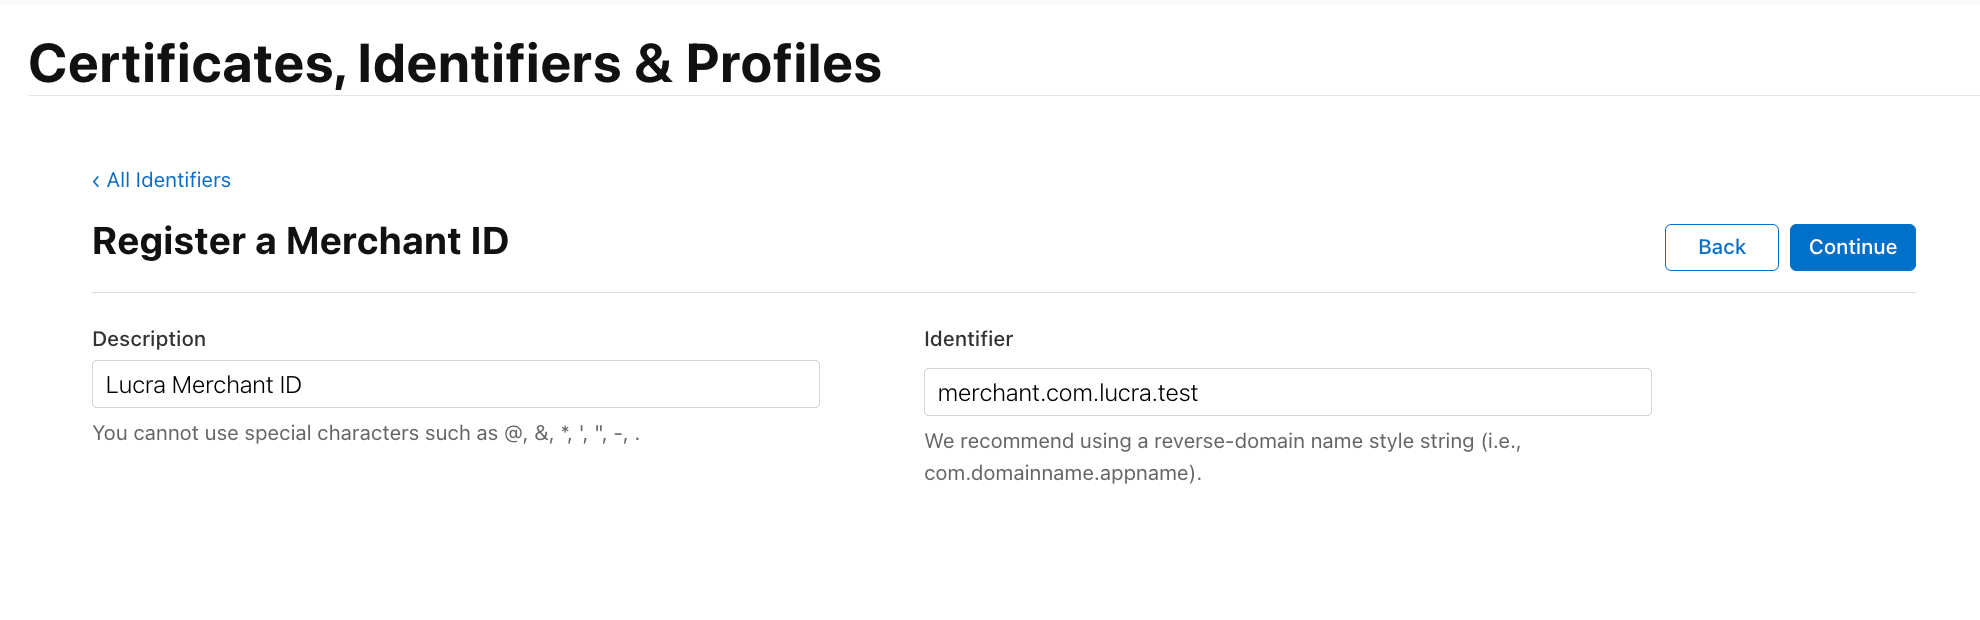
Enter the merchant ID, provided by Lucra in the
Identifierfield. TheDescriptionfield can have any label of your choosing. ClickContinue, confirm that the merchant ID was entered correctly and then clickRegister
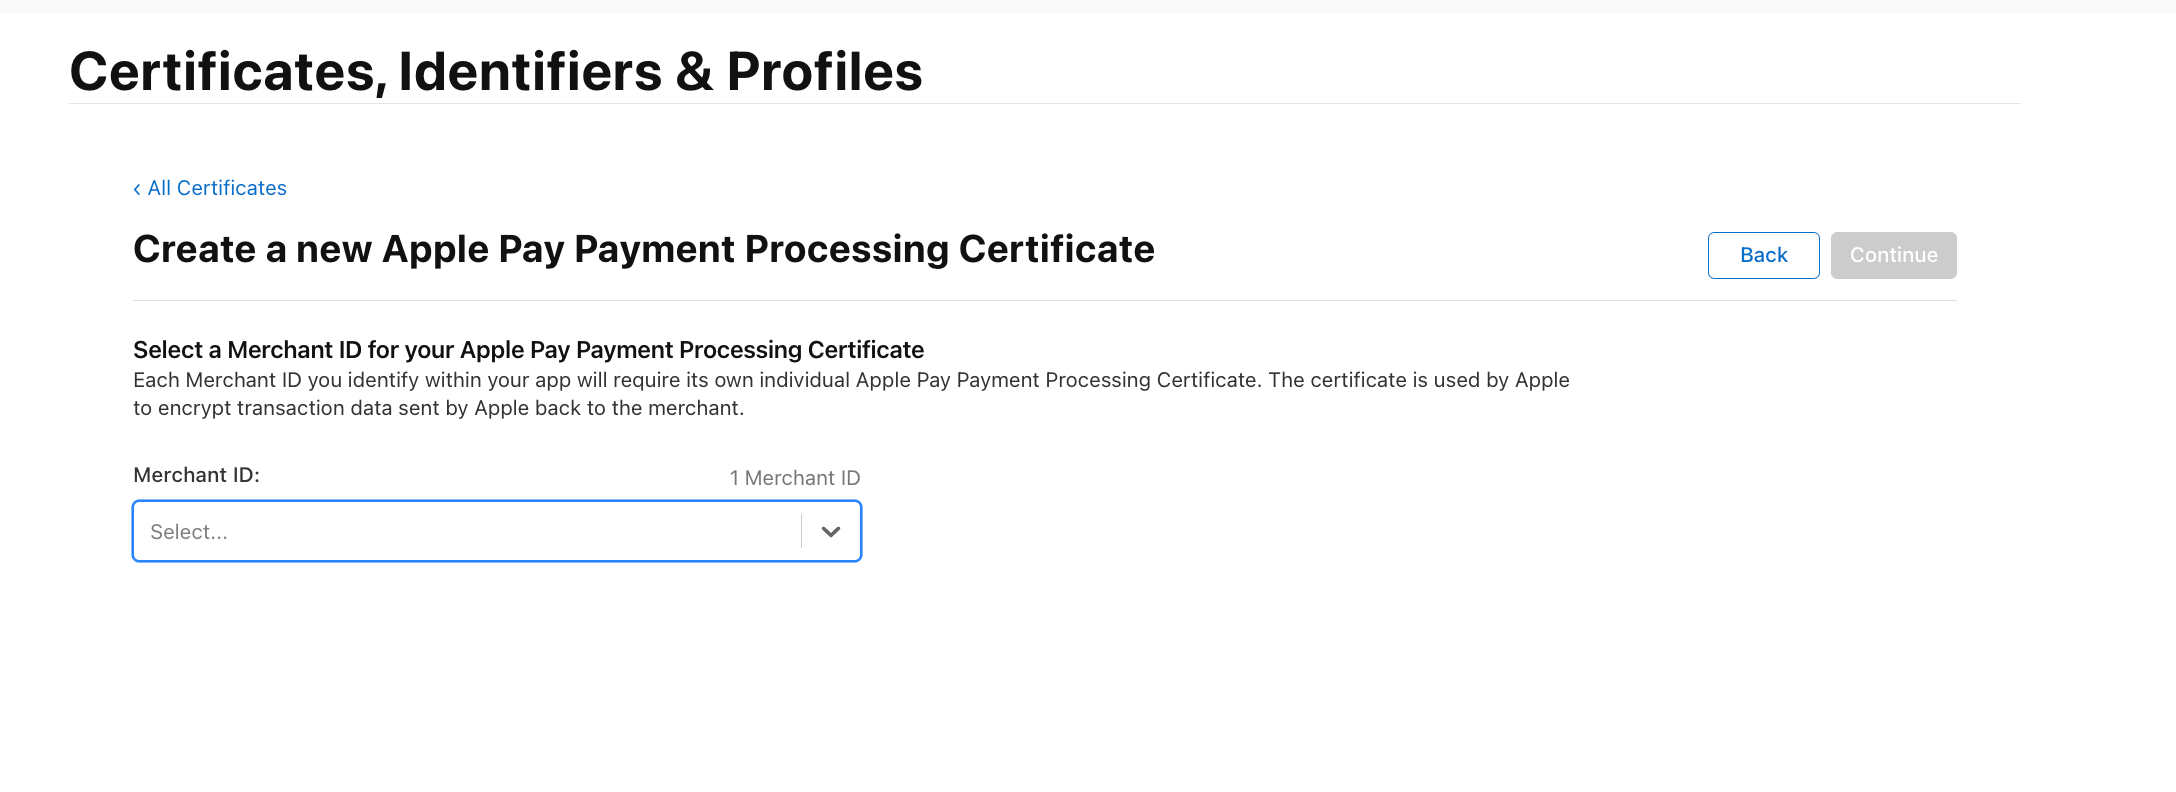
B. Create Payment Processing Certificate
Navigate to
developer.apple.com, clickCertificatesand click the+button to create a new certificate.Select the
Apple Pay Payment Processing Certificateradio button.

Click
Continueand select the merchant ID that was registered in step A.
Upload the Certificate Signing request that was provided by Lucra.
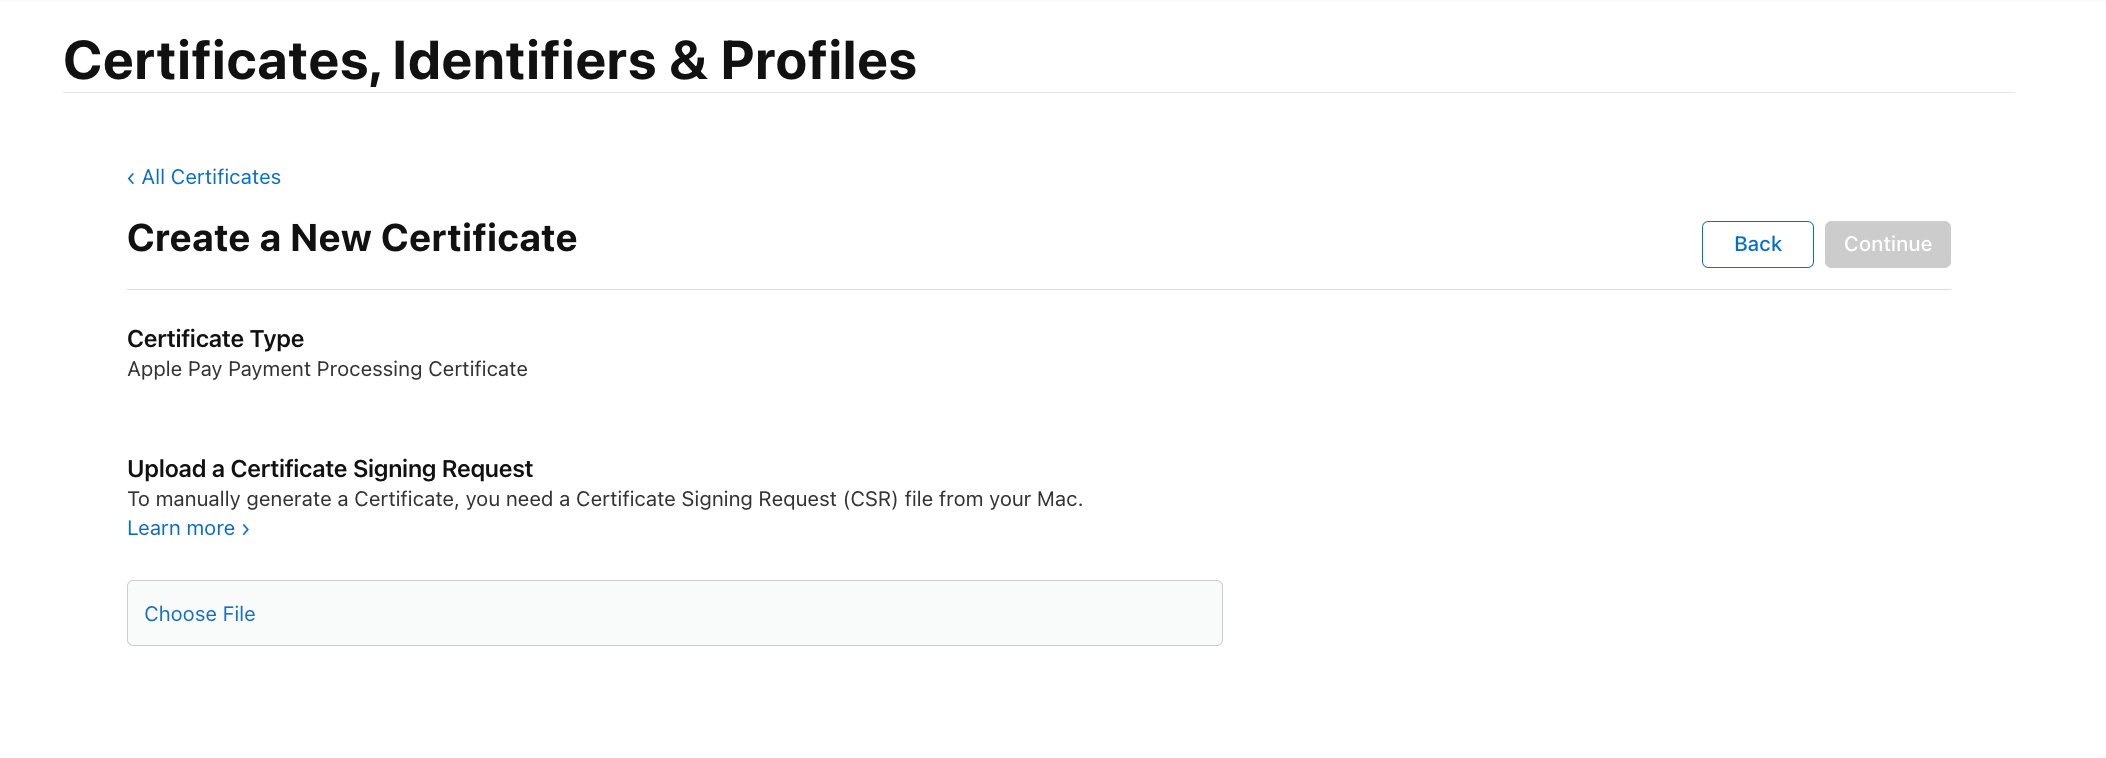
Verify that the certificate details are correct and press
Save.
C. Share the Certificate with Lucra
After generating the Apple Pay Payment Processing Certificate, you must send it to Lucra to complete the integration.
Send the certificate that you downloaded in Step B to Lucra's implementation team.
Lucra will provide confirmation once the certificate has been successfully uploaded into their system.
Wait for Lucra to confirm that setup is complete before proceeding with testing.
It is essential to verify with Lucra that all configurations are finalized before running any Apple Pay transactions.
D. Add the Apple Pay Capability in Xcode
The following is an excerpt from Apple's Documentation
Open your project with Xcode. In the Project navigator, select the project.
Choose the target for the app from either the Project/Targets pop-up menu or in the Targets section of the outline view.
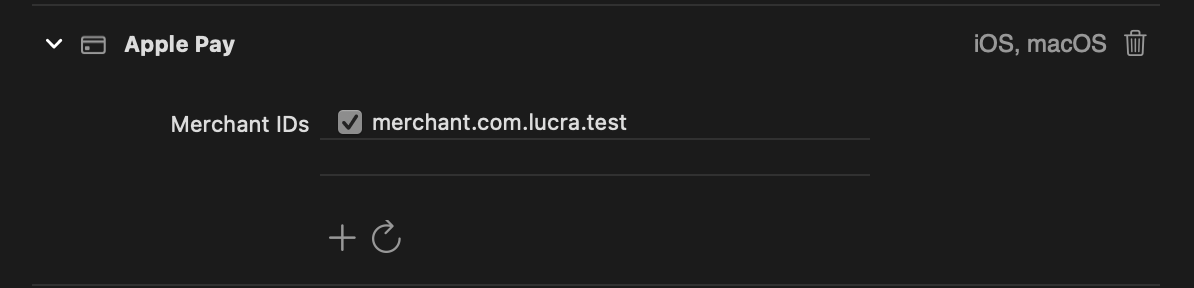
Click the
Signing & Capabilitiestab in the project editor.In the toolbar, click the Library button (+) to open the Capabilities library and select the
Apple Paycapability.Within the
Apple Paycapability, click therefreshbutton to synchronize your merchant identifiers from the Apple Developer site.Select the merchant identifier to use with this app.
E. Assign Merchant Identifier to Bundle Identifier
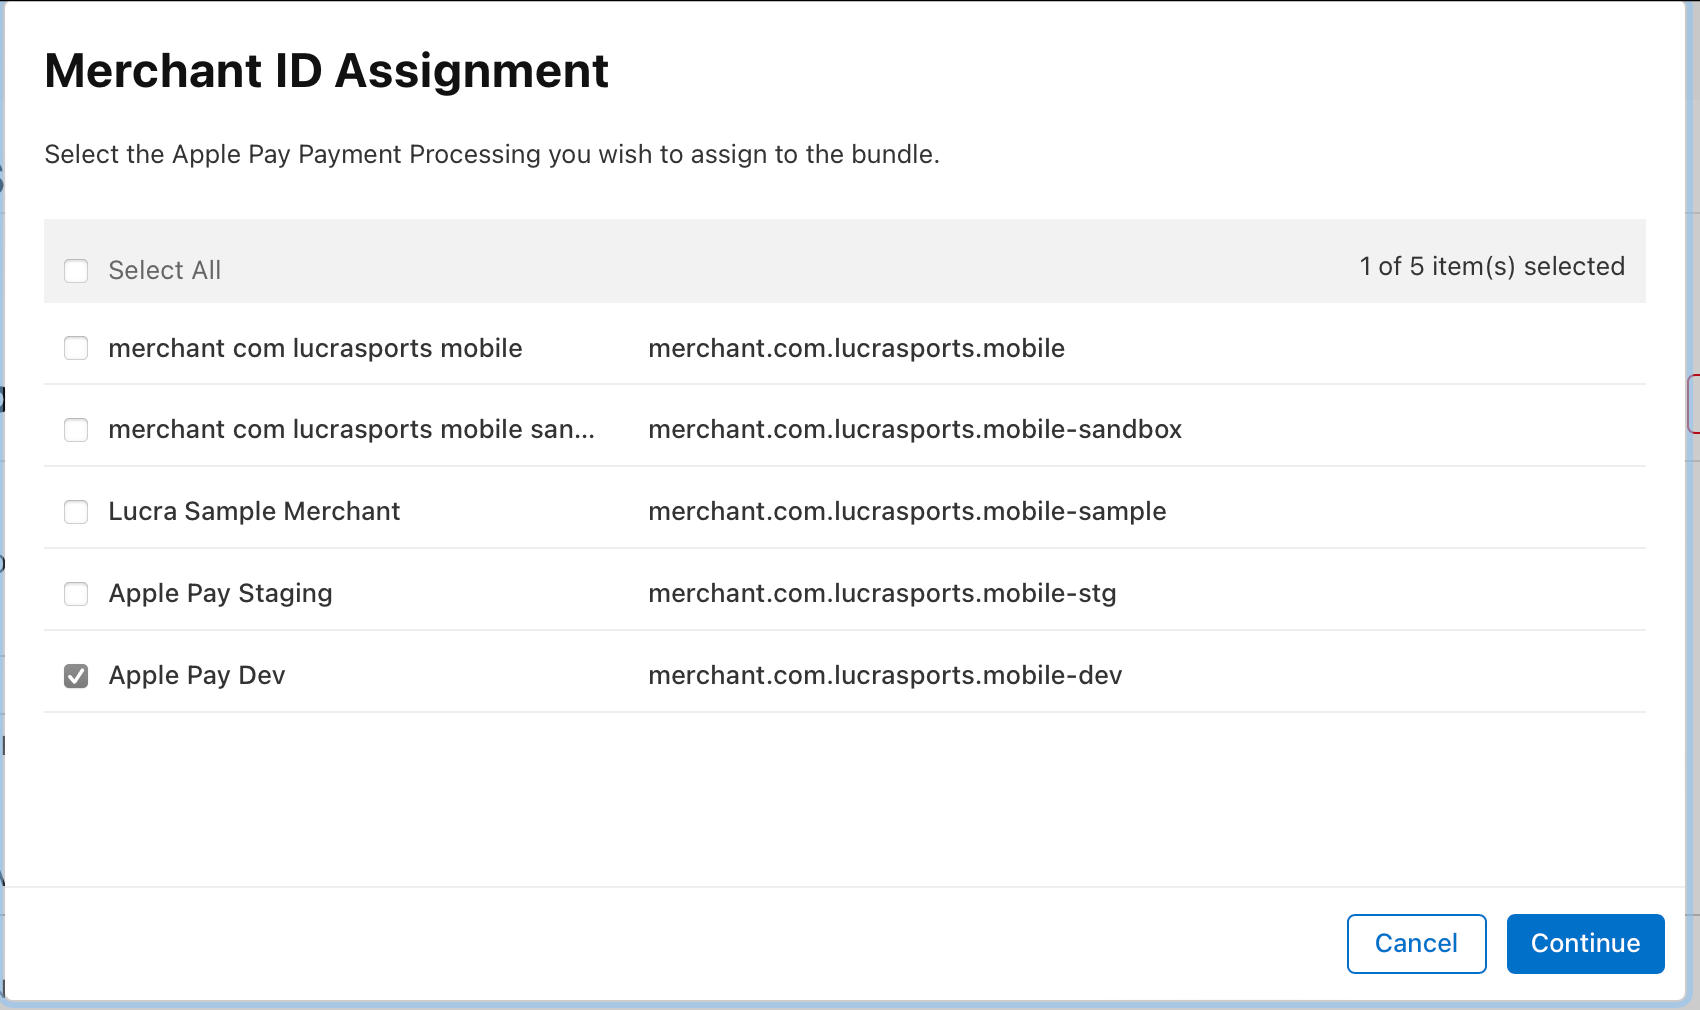
Navigate to
developer.apple.com, clickCertificatesand clickIdentifiers.Click the relevant bundle identifier, for the project where Apple Pay will be installed.
Click
Editnext to the Apple Pay Capability (screenshot below).
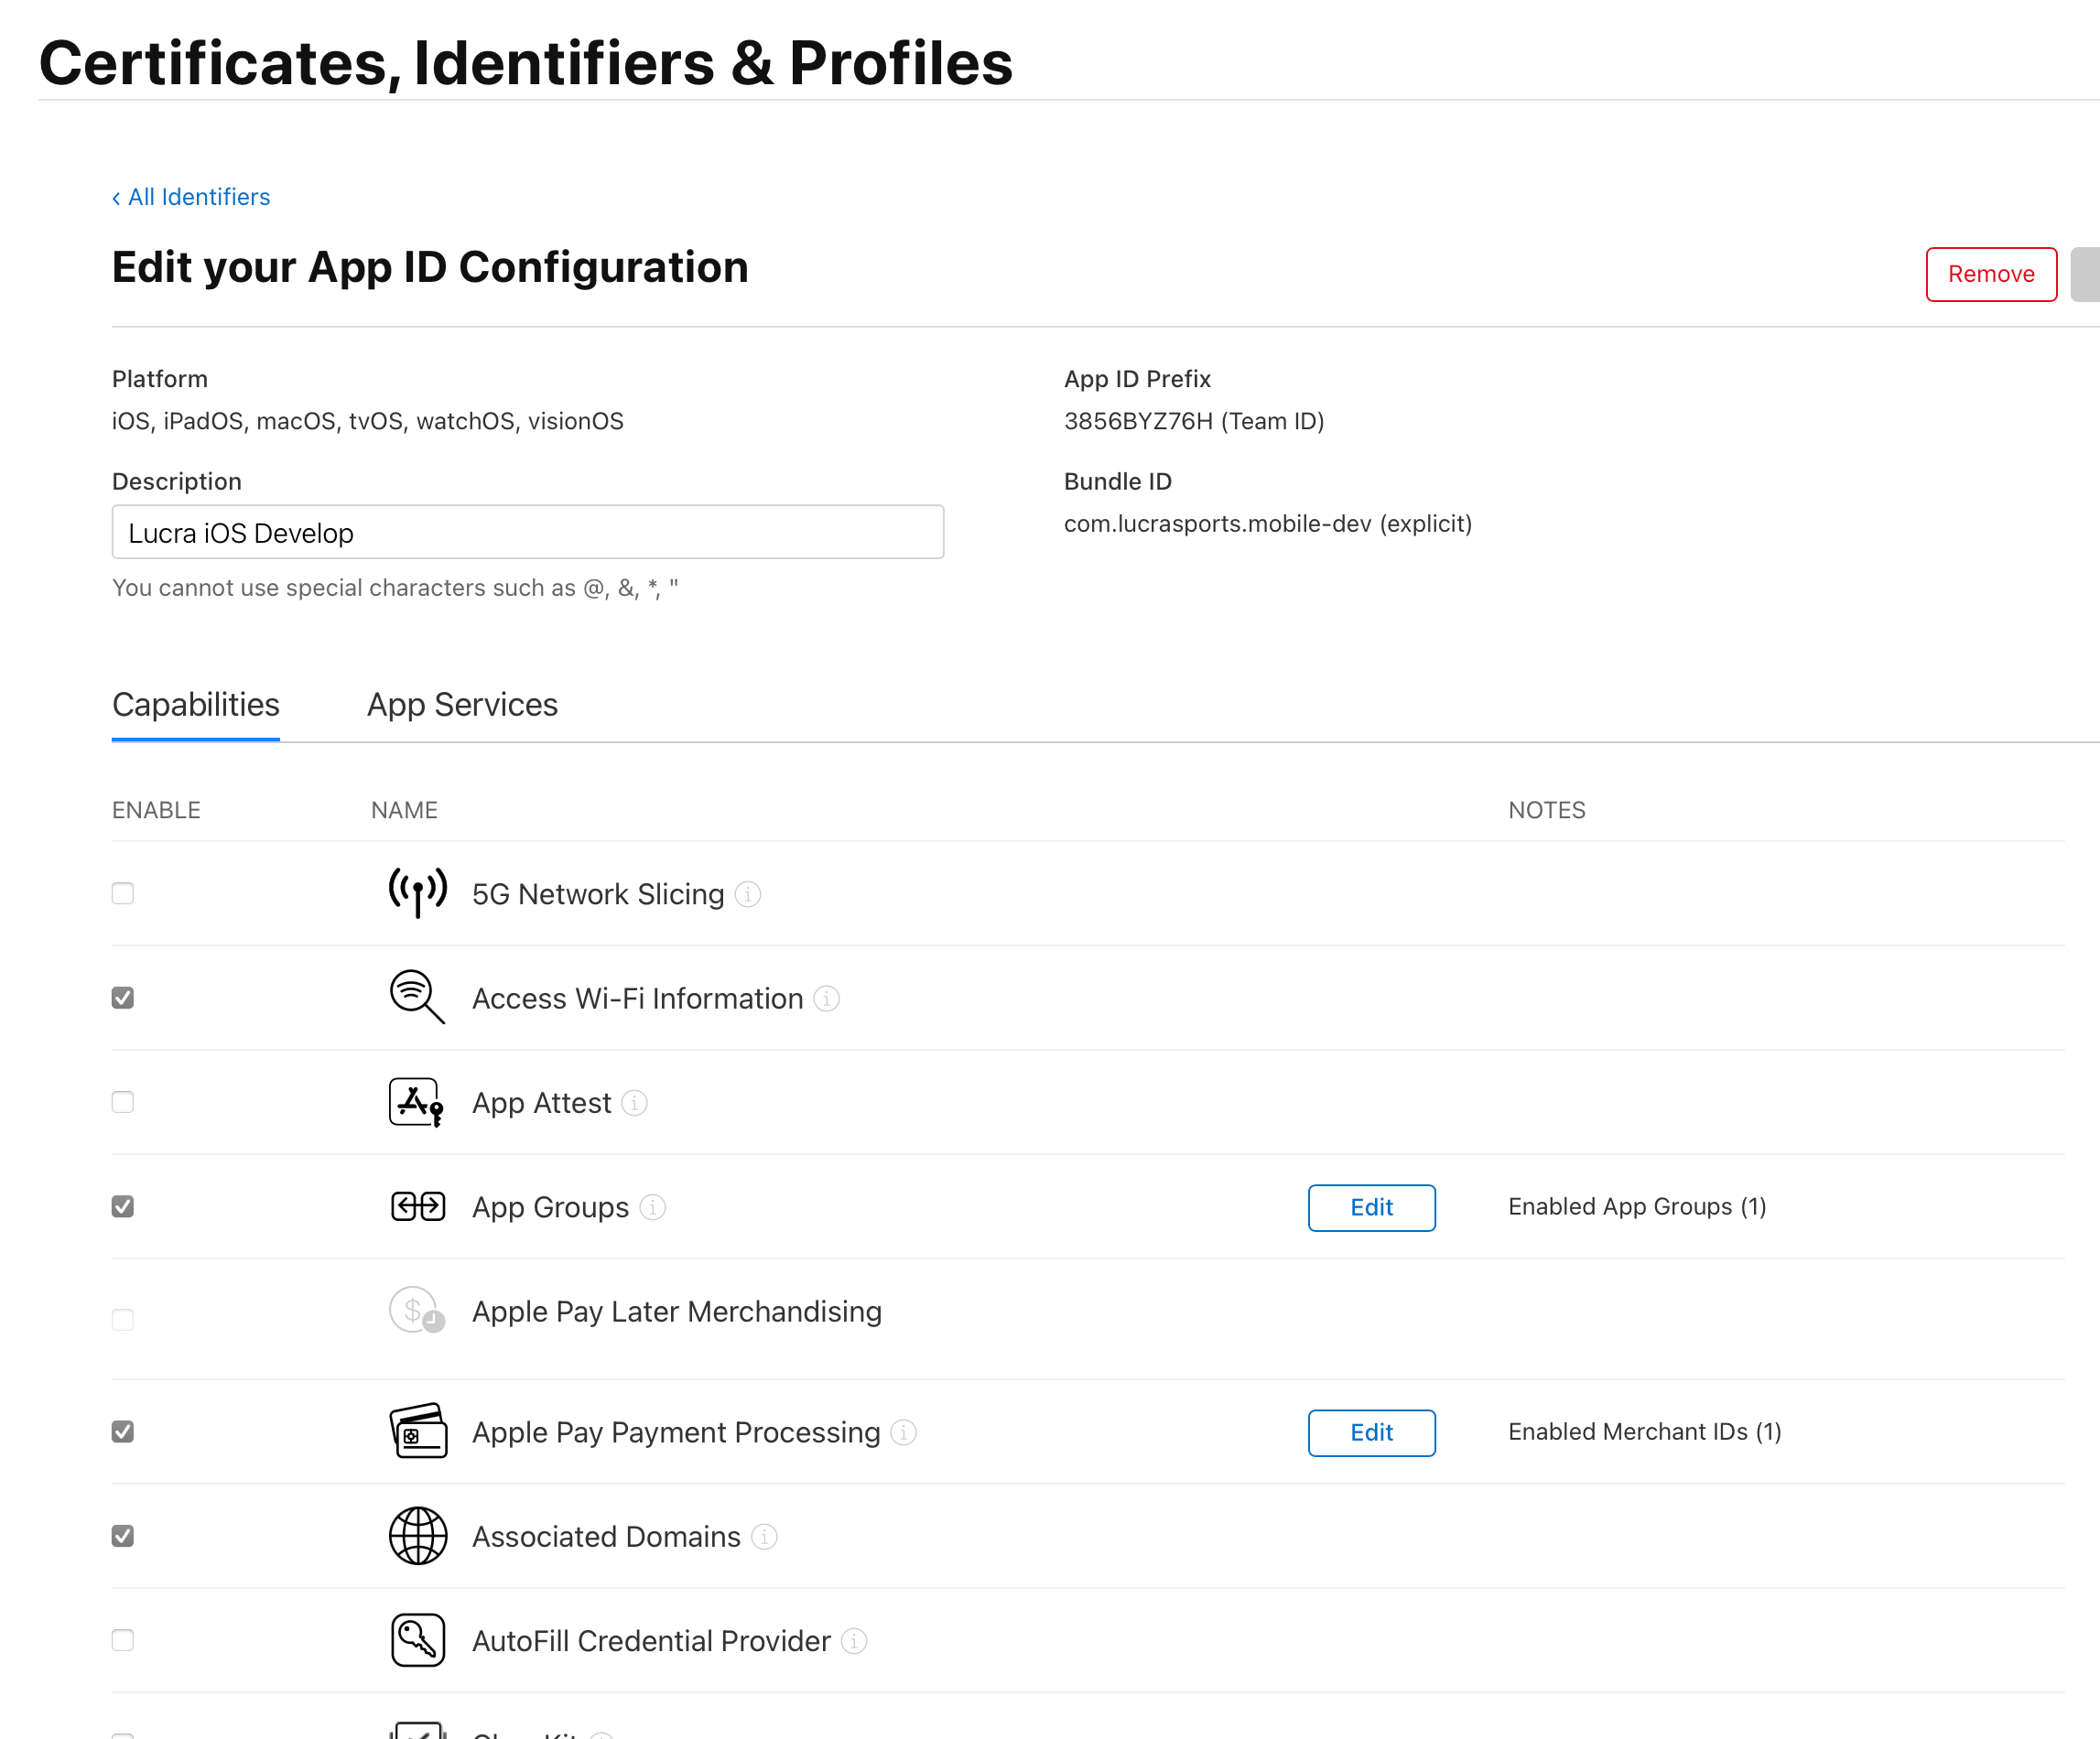
Assign the Merchant Identifier to your bundle ID by checking the box next to the Lucra Merchant Identifier (screenshot below).
Click
Continue.
F. Pass the Merchant ID into the SDK
The LucraClient object takes an optional parameter of merchantID. Pass in the merchantID that was registered in step A, as shown below.

G. Testing Apple Pay
In order to test Apple Pay without using real credit cards, a sandbox environment must be setup according to Apple's instructions.
Apple's Documentation outlines this process in detail, and a brief summary of this procedure can be found below.
Create a Sandbox Tester Account
Login to the Sandbox Tester Account on a real device
Add a test card number (found in Apple's Documentation)
Last updated